
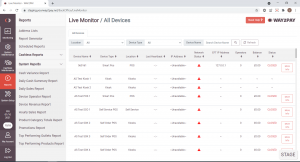
The WAY2PAY Back Office has a wide range of reports that users can run. Reports can be viewed in different ways:
- Previewed within WAY2PAY
- Send to email addresses in either a PDF, Excel or CSV format
- Send to your organisations FTP (file transfer protocol) folder on the WAY2PAY server
- Scheduled to send to email addresses or to your organisations FTP (file transfer protocol) folder every hour, day, week or month.
Although there are currently 9 cashless reports, 10 system reports and 5 report generator reports, the process of running a WAY2PAY report is practically the same for each report other than you can select the columns you want to display in the Report Generator reports, whereas the Cashless and System report columns are not configurable. Please use the following steps to run a WAY2PAY report:
- Once signed into the WAY2PAY Back Office, press the ‘Reports’ navigation button and then select one of the following options:
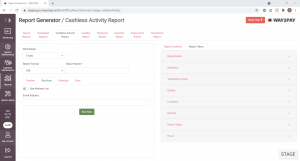
- Report Generator – 6 report options including ‘Cashless Activity Report’, ‘Loading Report’, ‘Payments Report’, ‘Rewards Report’, ‘Sales Items Report’ and ‘Transaction Report’.
- A report from the Cashless Reports dropdown
- A report from the System Reports dropdown.
- If the report you require is not visible, please speak to the manager or team that manage the WAY2PAY system for your organisation.
- Within the report, you now need to configure your report:
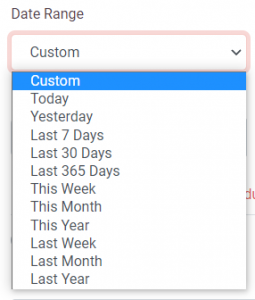
a. Date Range – There are a wide range of options here:
- Custom date range which is suitable for a one off report, allowing you to set:
- Start date and time
- End date and time
![]()
- Pre-defined date ranges that are suitable for scheduled reports so the same date range can be used for all future reports:
- Today – Suitable when a scheduled report is required each day for the same day
- Yesterday – Suitable when a scheduled report is required each day for the previous day
- Last 7/30/365 days – Suitable when a scheduled report is required each week/month/year for the previous 7/30/365 days
- This week/month/year – Suitable when a scheduled report is required for the current week/month/year.
- Last week/month/year – Suitable when a scheduled report is required each week/month/year for the last week/month/year.
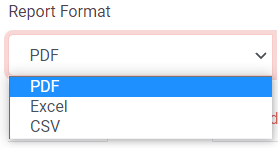
- Report Format – If the report is being sent to email addresses you will need to specify whether the report is required in PDF, Excel or CSV
- Report Name – Proide a suitable name for your report

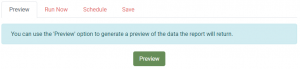
- Preview/Run Now/Schedule/Save
- Preview – The report will run within the Back Office and provide a preview. Please note, the preview is limited to 10,000 records
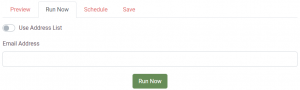
- Run Now – The report will send one report to an email address or address list
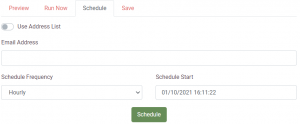
- Schedule – The report will schedule reports to send to an email address or address list for the specified frequency and start at the scheduled time specified
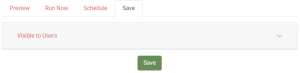
- Save – The report will be saved and can be accessed within the ‘Saved Reports’ section of the ‘Report Generator’ module. You can also specify which users can see the saved report. **This is Report Generator specific and not available in other WAY2PAY reports**
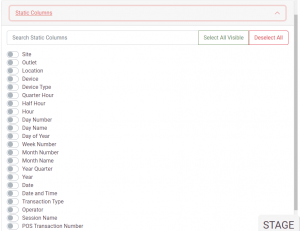
- Report Contents – Select the columns you wish to display in your report **This is Report Generator specific and not available in other WAY2PAY reports**:
- Static Columns – Displays all data columns you can include in your report
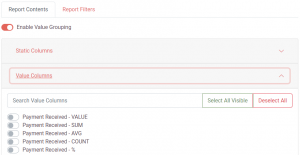
- Value Columns – Displays all financial columns you can include in your report
- If a value columns are added, the ‘Enable Value Grouping’ toggle must be turned off
- If sum, avg, count or % columns are added, the ‘Enable Value Grouping toggle must be turned on.
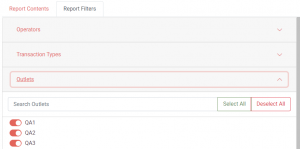
- Report Filters – Select the filters you want to apply to the report to show or hide specific information in the report. For example, if you want to limit the report to only display a particular outlet, you would only toggle the outlets you want to include on and the others off.
- Once all steps above have been completed, press the Previous/Run Now/Schedule/Save button. From here, depending on the output you selected, the report will either:
- Preview – Run and provide preview
- Run Now – Send to an email address or address list
- Schedule – Schedule future reports to send to an email address or address list as often as specified
- Save – Save the report in the ‘Saved Reports’ section of the ‘Report Generator’ **This is Report Generator specific and not available in other WAY2PAY reports**.