
Import Overview
When you access the Import Export tool through the ‘System’ menu you will be taken to the screen shown below.
Within the Import/export tool you have the ability to either importexport Products Items or Cashless Account Holders.
Products will be added to the ‘Product Manager’ and can be used to populate the template on the POS.
Accounts will be added to the ‘Account Manager’, ready for cashless IDs to be linked if necessary.
Create, Update or Delete
The import tool has 4 different functions; create, update, delete and default.

Create
The create function is used to add sales items or cashless account holders to the system.
CSVs for a create import should start with a 1.
Update
The update function is used to update details of existing sales items or cashless account holders.
Records are identified using the PLU code or SalesItemID (for sales items) or the Card Serial (for cashless account holders).
CSVs for an update import should start with a 2.
Delete
The Delete function is used to bulk delete records, using the PLU code or SalesItemID (for sales items) or the Card Serial (for cashless account holders) as identifiers.
CSVs for a delete import should start with a 3.
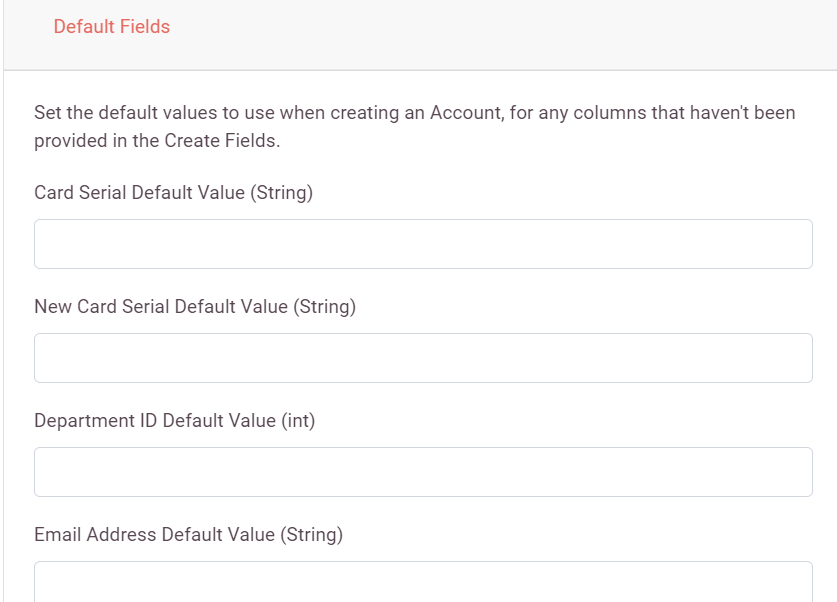
Default
Products Imports
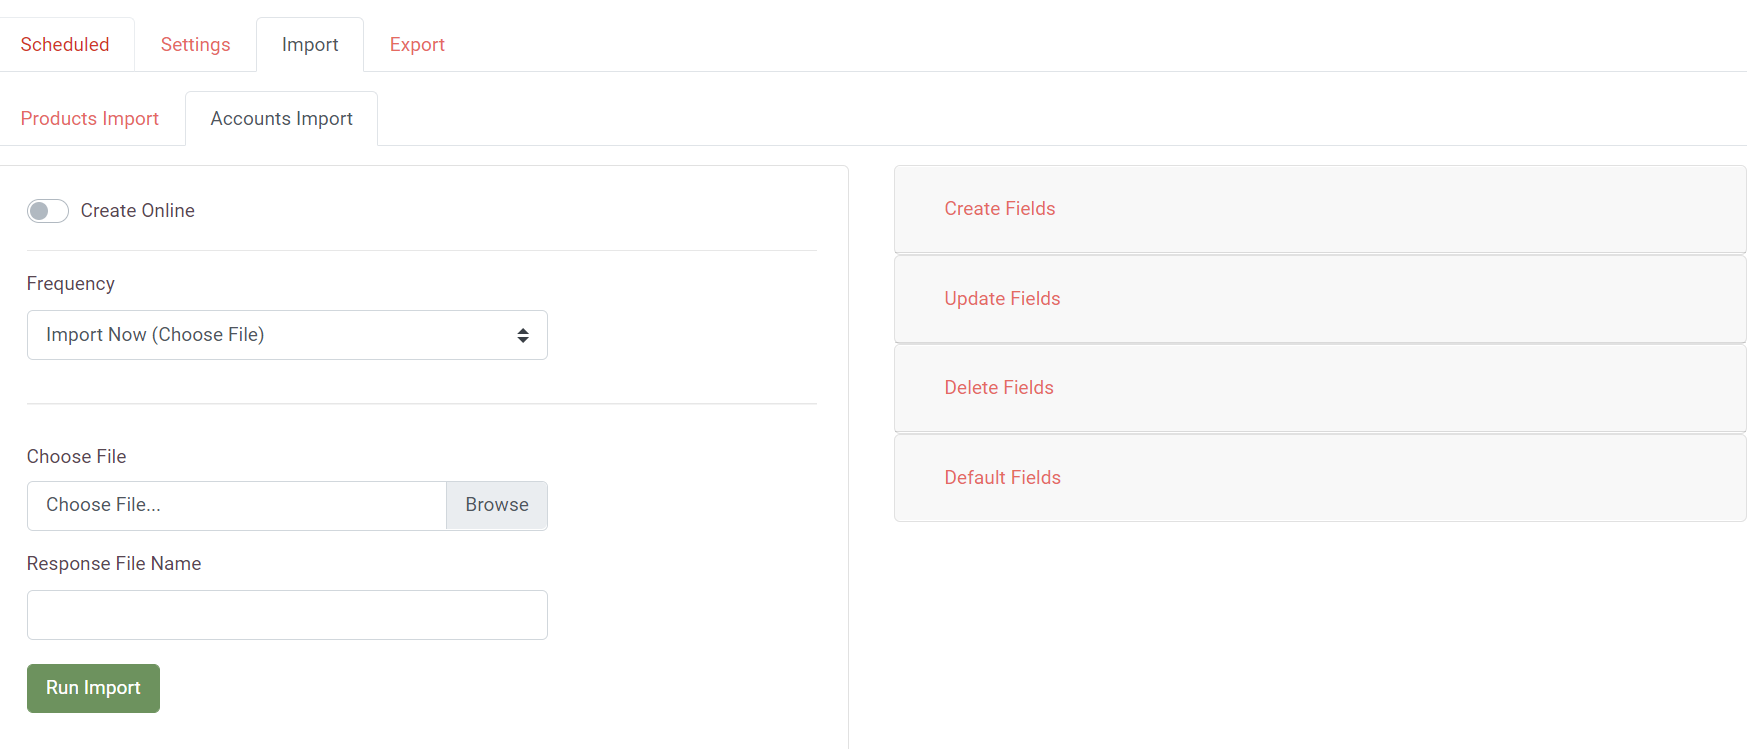
The screenshot below shows the sales item import screen, this is the same as the cashless account holders import screen, but with different available fields.
The table below gives details of the available fields for a sales item import.
*C/U/D = compulsory field for Create, Update or Delete
| Sales Item Import | ||
|---|---|---|
| Field | Description | Example |
| Report Group 1*C | The ID of the main reporting group needs to be provided | 2 |
| Report Group 2 | The ID of the secondary reporting group needs to be provided | 3 |
| Report Group 3 | The ID of the third reporting group needs to be provided | 4 |
| Name*C | The name of the Sales Item | Budweiser |
| VAT Code Number | References the ID of the VAT in cfCompanyVat table | 1 |
| Size Modifier ID | The size of the item/portion – This is represented by the modifier ID taken from the cfsizemodifier table | 2 |
| Type Modifier ID | Variance of sales item i.e. rare, medium, well done steak – This is represented by the modifier ID taken from the cftypemodifier table | 4 |
| Chained Sales Item ID | This can be used to link the item to other sales items that are often bought at the same time. E.g. you could link chips to a burger | 23 |
| Chained Menu ID | Same as chained sales item but links to the menu on the till to select the chained sales items. E.g when a burger is bought the side dishes menu is automatically opened. | 45 |
| VAT Template ID | References a VAT template that allows different VAT rates | 3 |
| Barcode | The barcode if the item if it has one | 89432494 |
| Tare | Weight of container for items where price is based on the weight. E.g. salads | 34 |
| Cost Price | The price that the company pays for the item. | 0.20 |
| PLU ID*U/D | This is the universal item code that is often used to identify the sales items between different databases/systems. | 2153 |
| Kitchen Printer | This field will determine which printer the kitchen ticket for the item will be sent to. | 2 |
| Long Name | You can specify a user friendly name to be used in Allergen Aware | Chicken Burger |
| Menu Groups | The menu groups allow you to specify which menu the items should be included in on Allergen Aware | 1 |
| SalesItemID*U/D | This field does not need to be provided for an initial import, when sales items are added to the database they will automatically be given a salesitemID. This field is used to identify items in an update or delete. | 39 |
| Flags | For each flag there needs to either be a 1 or a 0. If a flag isn’t provided in the imported CSV then that flag will automatically be set to 0, unless this has been changed in the default values. The user would normally select all the flags that a batch of sales items use and provide 1 or 0 in the CSV. This makes it so the user doesn’t need to import each set of sales items based on the flags they use. | 1 or 0 |
| Price Bands | All the current price bands will show in the ‘Available Fields’ list. The user selects a price band name from this list and in the CSV they provide a price for that price band. | 3.20 |
| Allergens | This will only be available if you are using Allergen Aware. A value needs to be supplied for all allergens. This will be 1 if the sales item contains this allergen and 0 if it doesn’t. | 1 or 0 |
Once the CSV file has been configured press the ‘Import File’ link and navigate to the CSV.
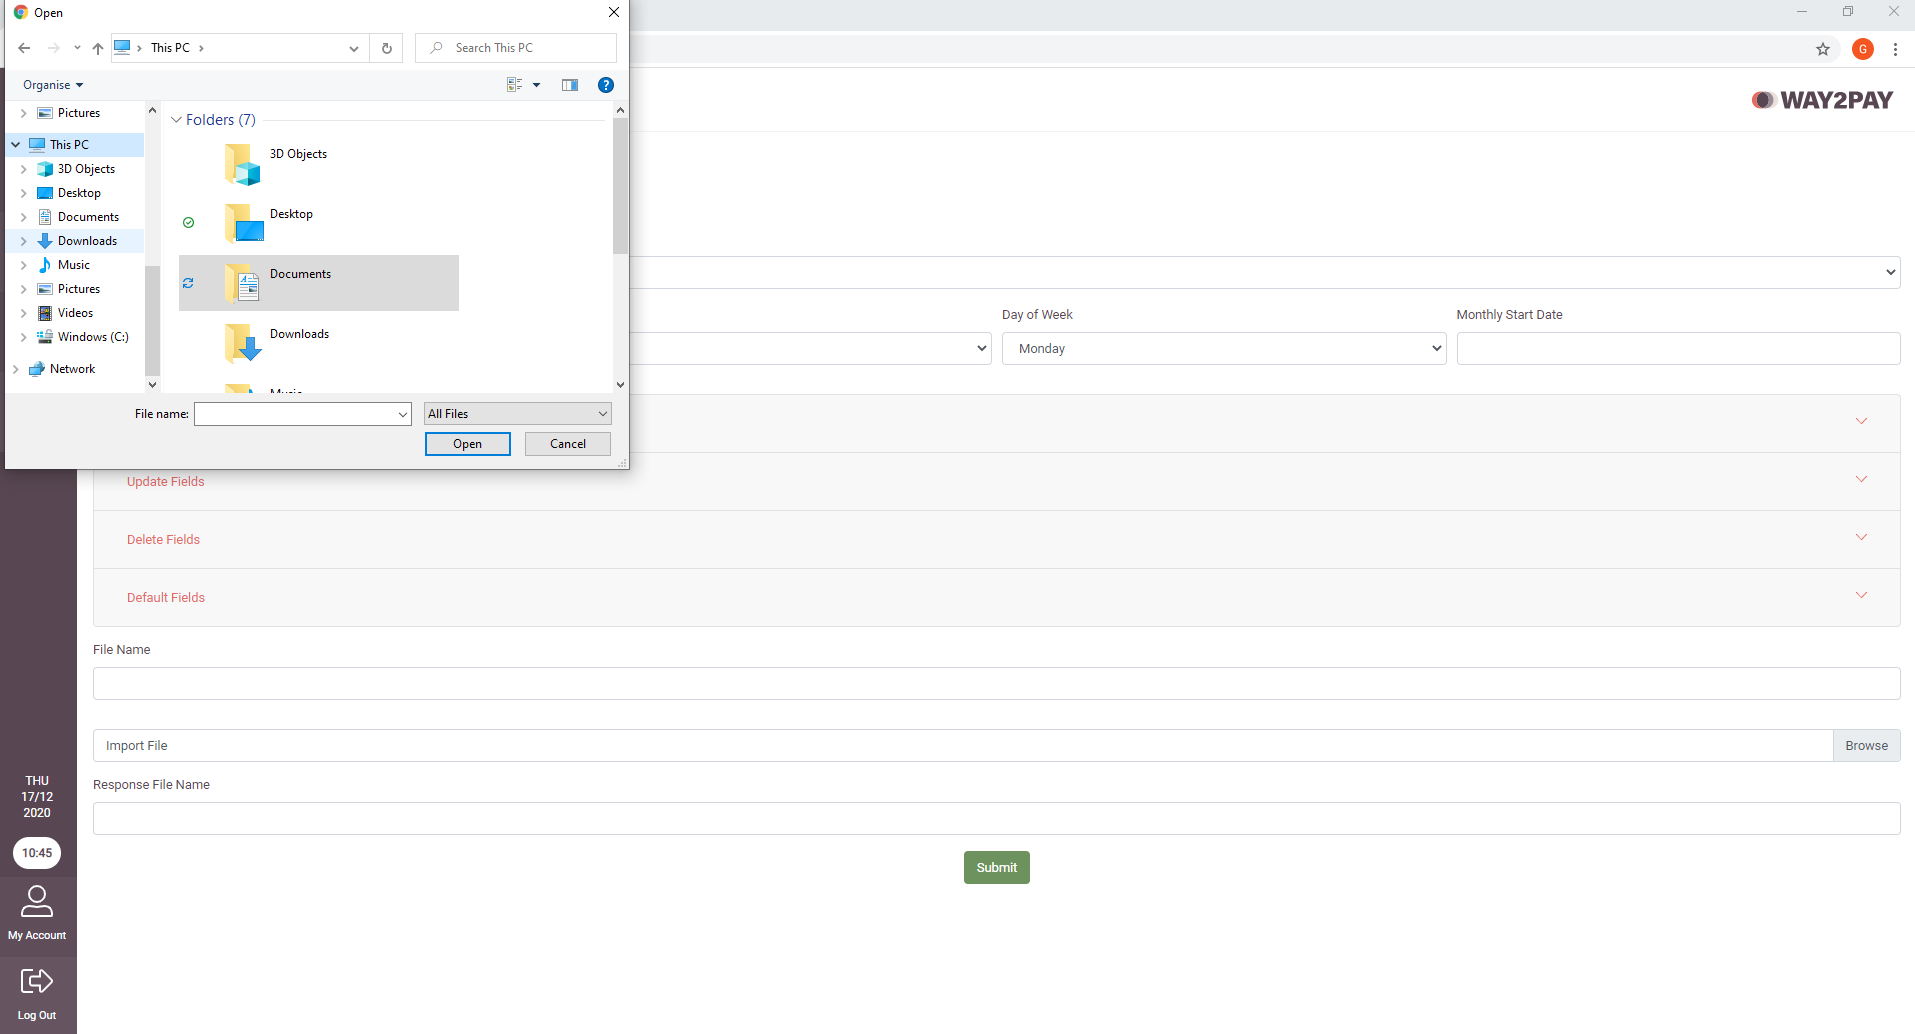
Once you have chosen the CSV file you need to commit to the upload.
A prerequisite for running the CSV files on a time/ date basis is that an FTP link has to be setup with the customer and Counter Solutions to allow these files to be shared. This will be setup when the customer database is created.
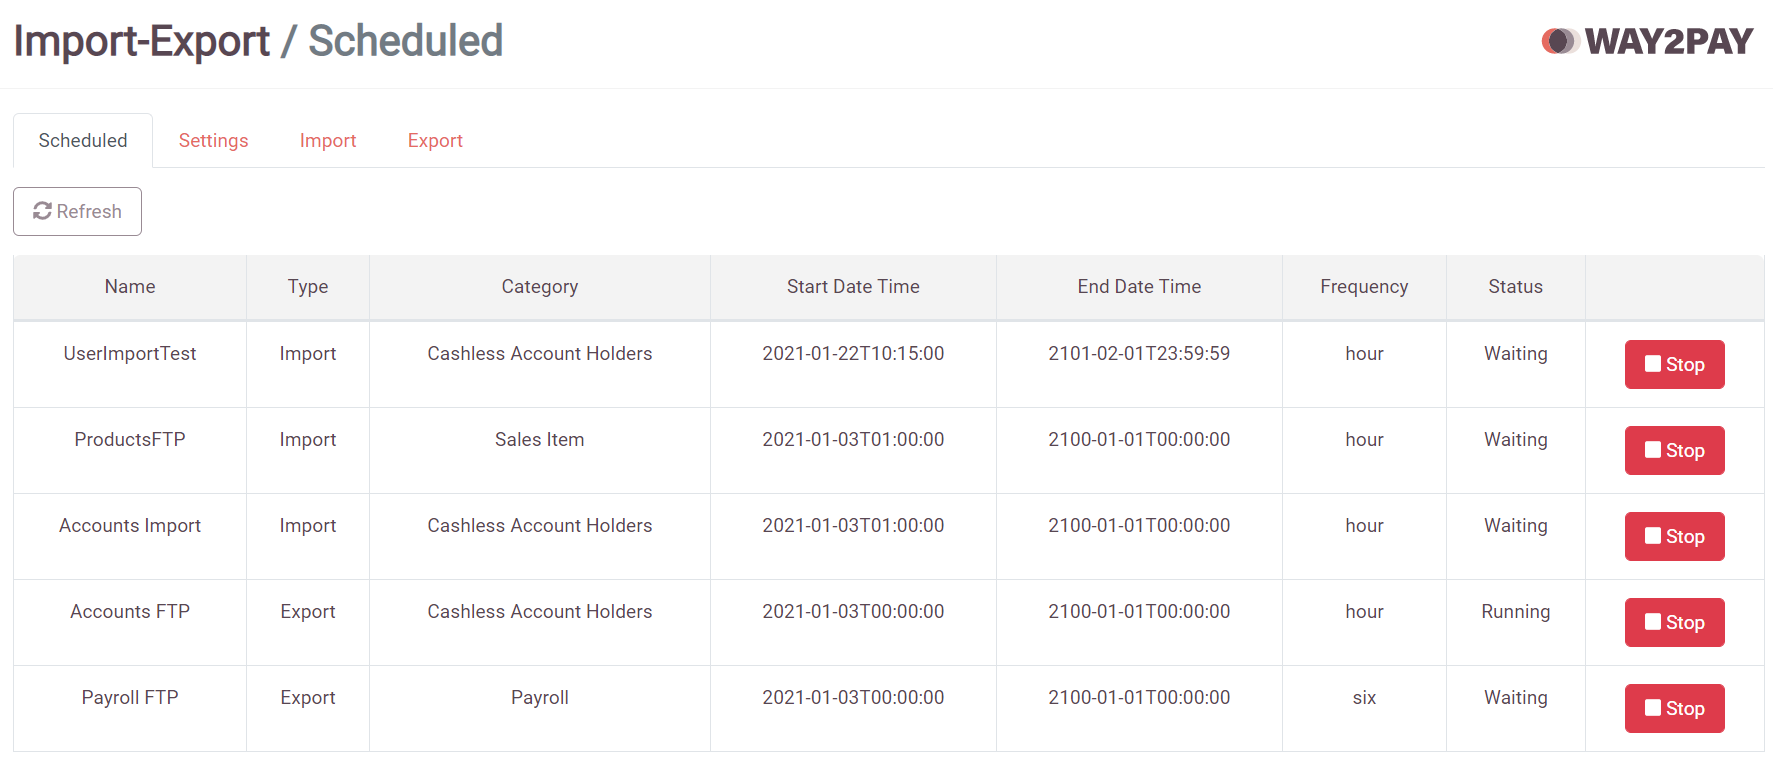
Once the CSV file upload has been started you can check the status of the file by pressing “Scheduled” at the top. The Schedule Status states the current process of the file upload.
Scheduled Waiting to be processed
Running The file is processing
Misfire For some reason the file has failed to process
Finished The file has been processed
Account Holder Import
The process for importing cashless account holders is the same as the one for importing sales items, the only difference being that you can choose to make the accounts online at the same time.


The table below gives details of the available fields for a Cashless Account Holders import.
*C/U/D = compulsory field for Create, Update or Delete
| Cashless Account Holders Import | ||
|---|---|---|
| Field | Description | Example |
| Card Serial*U/D | The UID of the Card/Key the company uses for each person | 12312514235 |
| New Card Serial | This field is only relevant for update imports | |
| Department ID*C | The ID of the department | 1 |
| Email Address | Mandatory for Online accounts, is used to send log in details | e@e.com |
| First Name | Users first name | John |
| Second Name | Users second name | Smith |
| Badge Number | The way the company may reference the person | 22346134 |
| Payroll Number | The users payroll ID | 4222 |
| Payroll Group | The payroll group that the user belongs to | 19 |
| Username | The username for loader site users. This will be defaulted to their email address if a username is not specified | User555 |
NB: If an update is needed but there are no card serials then the email address or username can be used as a unique identifier instead.
To use the email address use -9999 instead of a card serial
To use the username use -8888 instead of a card serial
Export Overview
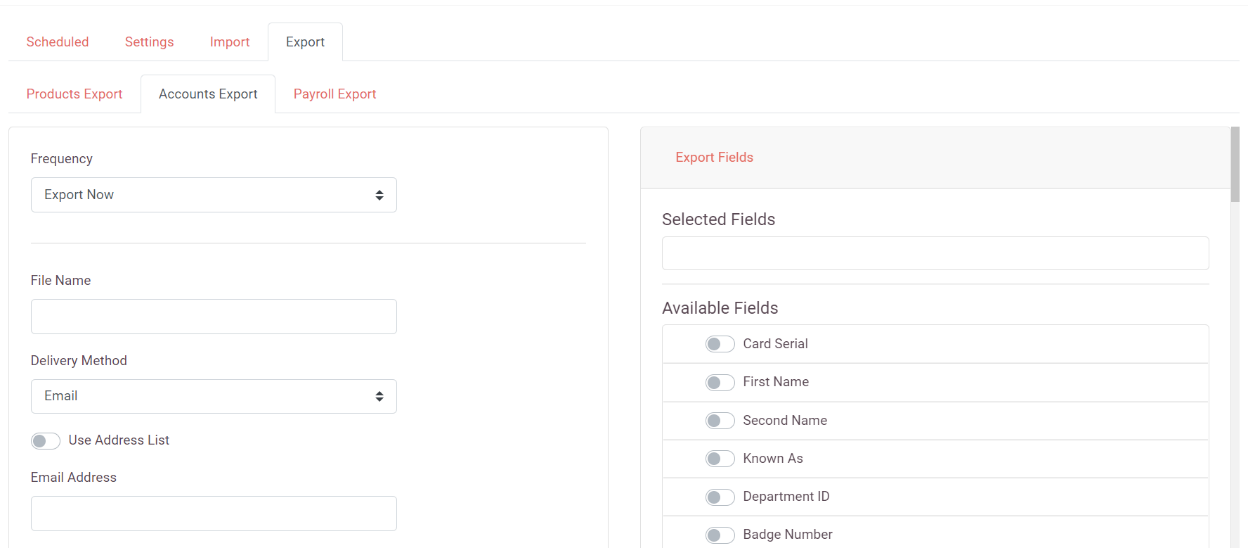
To open the export manager simply navigate to the Import Export tool from the ‘System’ menu, then press the Export tab at the top of the page. The layout of the export manager is similar to that of the import manager.
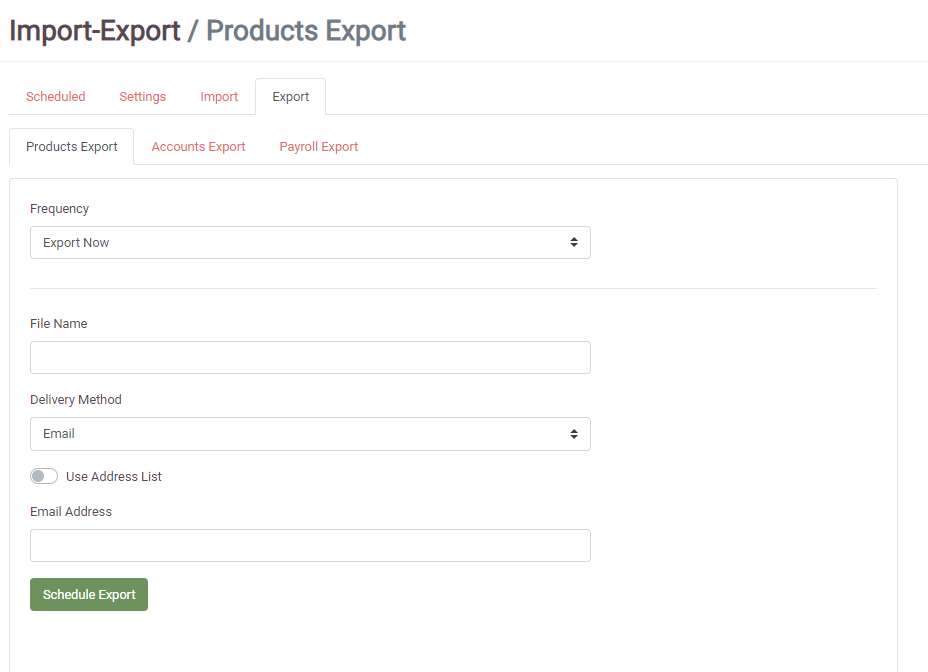
Within the export tool you have the ability to export:
- Products
- Accounts
- Payroll
The Frequency section allows you to select when you would like the import to run. Normally if you are importing Sales items the “Run Now” option would be selected. The other timed options tend to be used when importing cashless account holders from other systems on a regular basis.
Exporting Sales Items and Cashless account holders is fairly straightforward, you just double click fields from the Way2Pay fields list to move them across to ‘Fields to be Exported’, then select the frequency of the export in the same way that you would in the import manager.
Export Reports
Using the exporter you can export reports that are created in the Report Generator
You can then choose which fields and totals to export
Choose whether to export now or schedule the report.
You select how you would like to receive the file (under “delivery method”): by email or to your FTP location. If you request the file by email, then you will need to enter your email address.
Now you can select “Schedule Export”.
Export Payroll
Payroll and overdraft details can be exported. This is mostly used for sites where employees don’t load money on to their cards, they just use the overdraft facility and then the balance is taken out of their wages at the end of each month.
Export all departments or choose a specific one from the dropdown list.
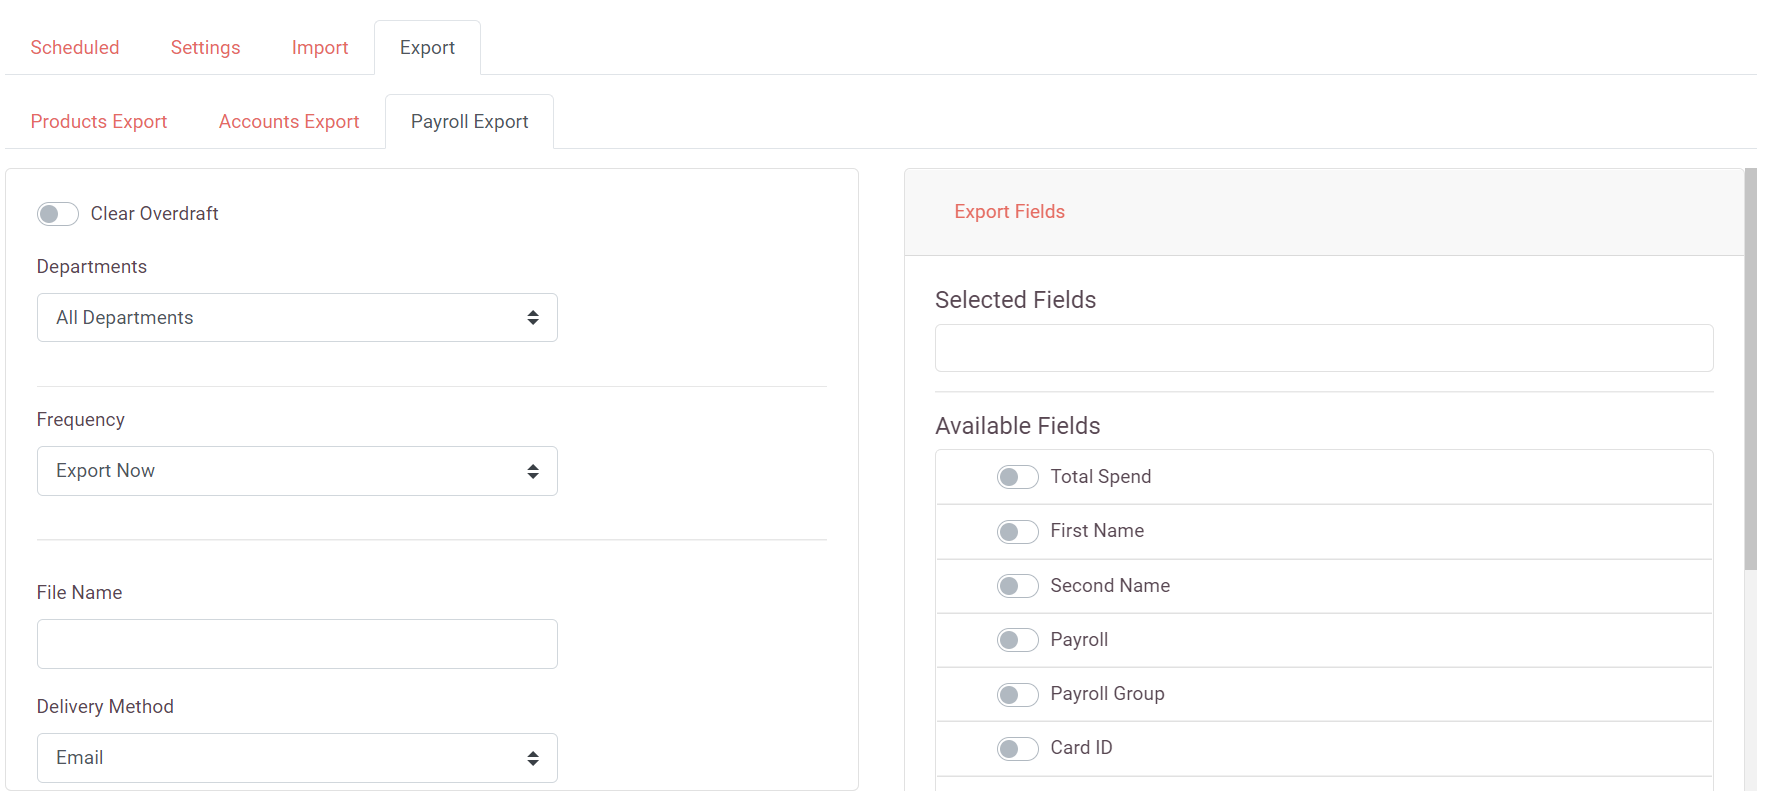
Make sure that the ‘Clear Overdraft’ checkbox is ticked.
If the overdrafts are not cleared then account holders will not be able to see an accurate account balance, as they will be just keep going further into their overdraft rather than restarting after each payroll export.
‘Total spend’ (found under export fields) is the only total available for export. This will combine the balances of all accounts.