Introduction
The ‘Template Editor’ module found within the ‘Maintenance’ tab is generally used by system users to create, design, and edit the screens and functions displayed on a POS.
The Template Editor module allows System Users to do the following:
- Create New Templates – Design the look and layout of a POS template adding and assigning sales items and functions to buttons.
- Manage and Edit – Existing templates already within the database
- Save Templates – Create and save templates your new templates to the Way2Pay database.
- Select Template – Choose from pre existing templates within the Way2Pay database.
- Name and Identify – Give templates Names and Template ID numbers which will be assigned within the Way2Pay database and pulled down in the Static to the POS to display the correct template required.
- Sub Template – Create templates accessed by buttons from the main template screen to allow for menu choices.
- Sicky Overlay – Enable multiple quantity or item choices from within a menu in a menu that overlays a menu button.
View Options

Found at the top right of the Template Editor gives ability for the following actions:
| Sub Templates | Sub Templates shows you a list of all overlay and update templates used within the main template. If you click on any of the templates in this list, then you will be moved into that template and see the buttons included in the ‘Keys’ list |
| Keys | Gives a list of all the keys currently assigned on that template. |
| Back To All Templates | Allows you to return from a sub template to the main template screen |
| New Key | Allows you to add a key onto to the template |
| Edit Key | Allows you to edit whichever key is currently highlighted |
| Delete Key | This allows you to delete the highlighted key from the template |
| Duplicate Key | Will copy the selected key |
| Properties | Gives you an overview of the setup and function of the template key. Here you can manually edit the properties of the highlighted key |
Create New Template
Naming Template

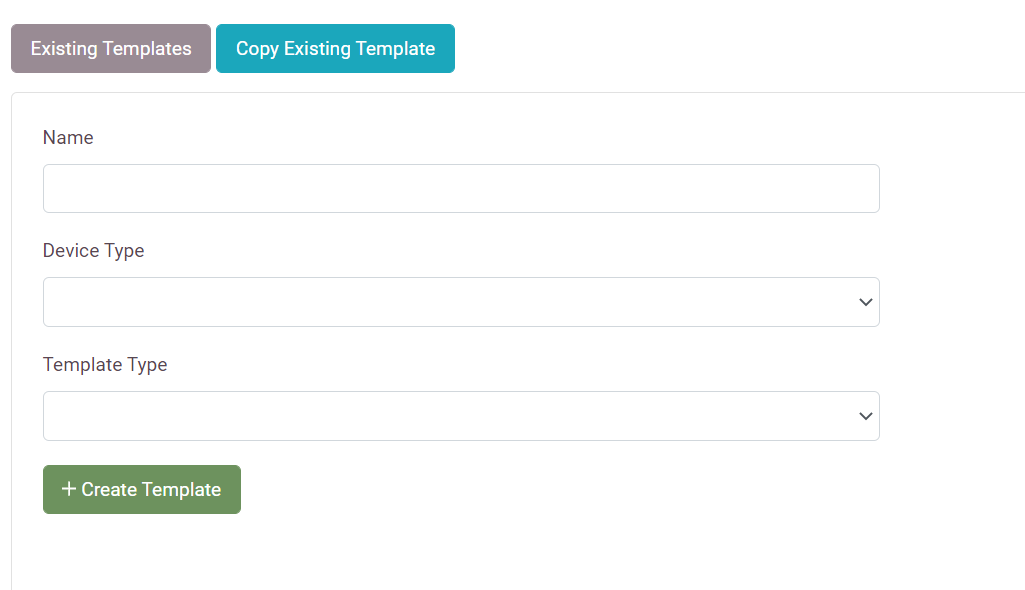
- Select ‘Create Template’ to Name a new template that you wish to create and to select the device type that the template will be displayed on.
- Type the name you wish to give the template. e.g. LUNCH
- Press “Create Template” and a blank template screen assigned that name will appear for you to begin editing.
Adding Keys
Press the green ‘Add’ key and open the ‘Add’ window. A preview of the key you want to add will be displayed in this window.
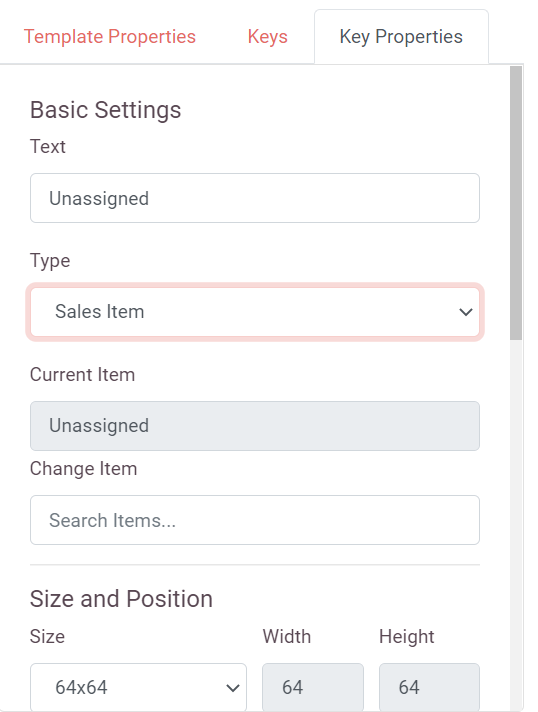
Key Types
- Sales Item – Add a single sales item to the template
- Size Modifier – Add a size modifier to the template
- Type Modifier – Add a type modifier to the template
- Template – Add a link to an overlay template, an update template, or a payment template to the main template. This is explained further below.
- Control Key – Add certain functions to the till such as print bill, abort, split bill etc.
- Payment Types – Add a payment type to the template, e.g. cash, pay to account or cashless.
- Text – Add text to the template. This will not act as a clickable key.
- Price Bands – Allows you to have different price bands on the till. You can switch freely between them if they are placed on the POS device
- Tender Values Allows you to add pre-set payment values to the till template. These can be used as quick press cash payments, for example when a customer pays with a note, a tender key could be pressed so that it automatically works out the change
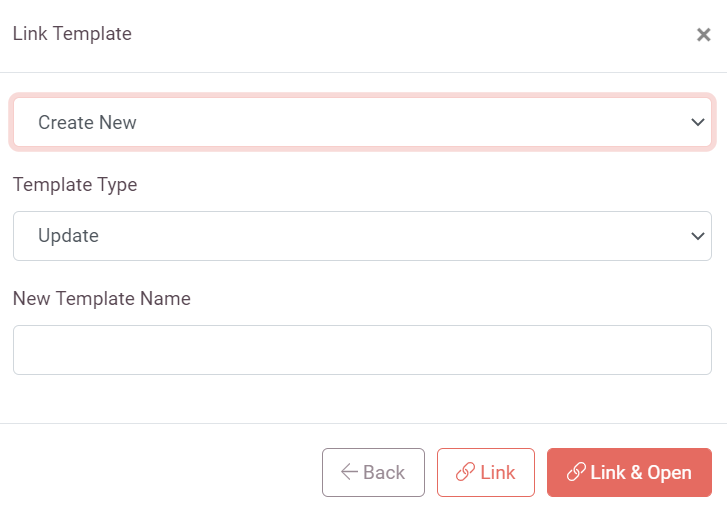
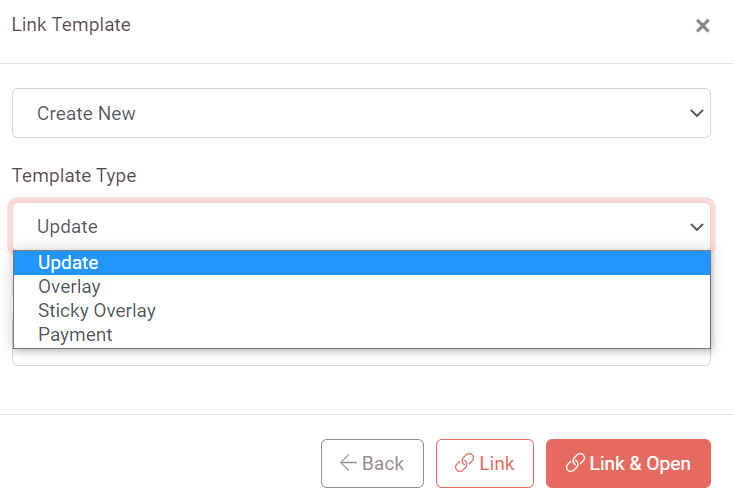
Link Template
If you select ‘Link Template’ from the key type dropdown list you will need to choose which sort of template you want the key to link to.
Options as below:

- New Link Template Name – Define here the name of the sub template (Menu).
- Update Template – Use when you want the till template to update a certain area of the POS screen whilst leaving other sections alone. Blank buttons need to be used on this sort of template
- Overlay Template – Button will open a conventional menu in an overlay box. Only one item can be selected from the template before it closes and returns to main menu.
- Sticky Overlay Template – This is the same as the Overlay template, but it allows you to select a few items before it closes and returns you to the main template screen.
- Payment Template – Add payment keys to the payment menu if payment types are not used on the main POS screen.
- Use existing Template? – Use to link an existing sub template to the button.
- Select “open & Link”
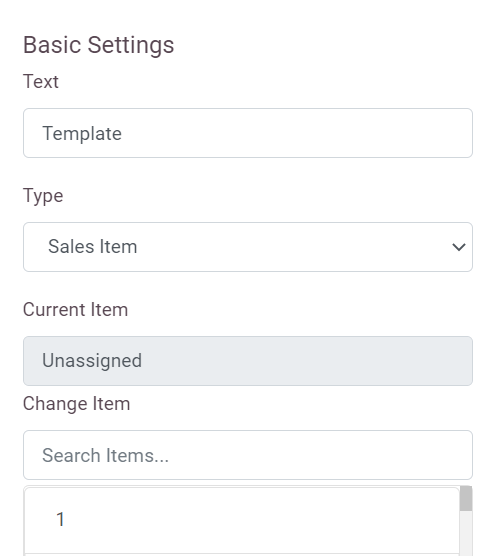
Key Text
Amend the description of the item shown on the key if you wish to change from what the item is saved in the database as.
Assign an Item
- Choose from the list of items within the database in the scroll down menu.
- Select to assign to the proposed key
Key Properties
- Shape Properties – Select from drop down menus the desired Size, Shape and Colour of the key.
- Font Properties – Select from drop down menus the desired front Size, Style, and Colour.
- Border Properties – Select from drop down menus the desired border Thickness and Colour.
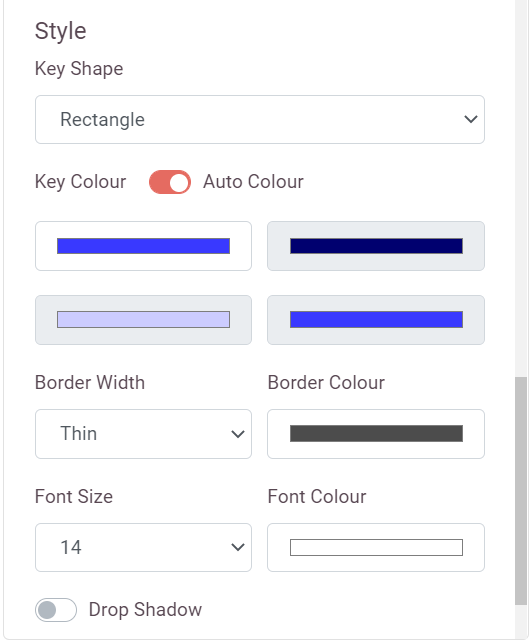
More Options
More options can be selected when formatting a Key. These are:
Drop Shadow – Adds a slight shadow behind the key.
Rounded Corners – Creates a smoother appearance to the Key by rounding off the corners.
Auto Colour – Auto colours the key when pressed to match the main key colour assigned.
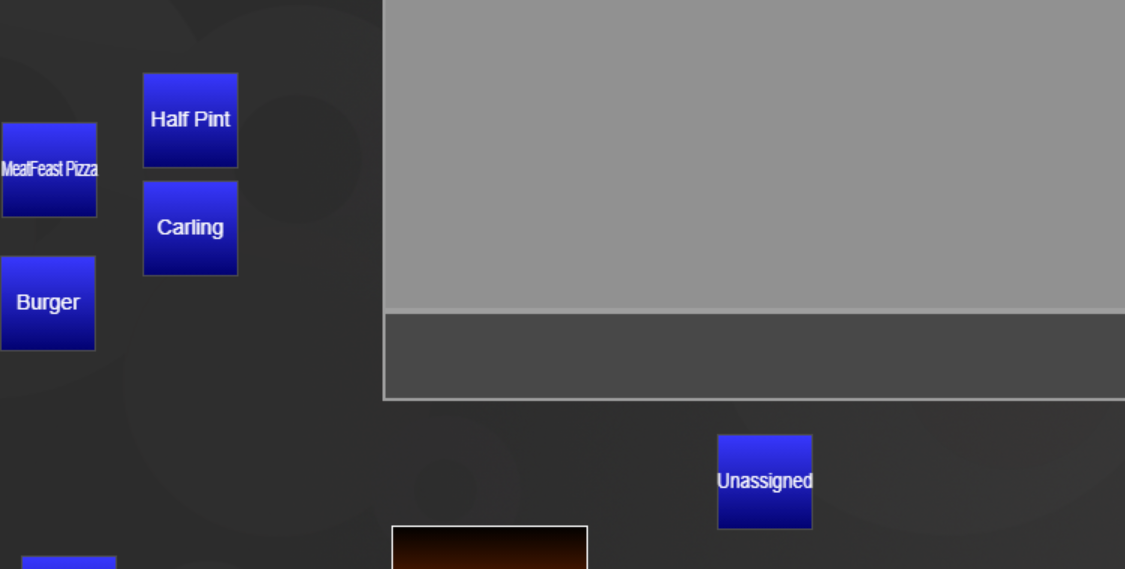
Layout and Positioning of Keys
- Once the Key has been formatted and assigned. it will then appear in the middle of the template screen.
- Drag and Drop the Key to the desired location.
- Key will ‘Snap’ into position on the X and Y axis.
- You may find key will not align perfectly at times. See section 3.2.8 for fine adjustments.
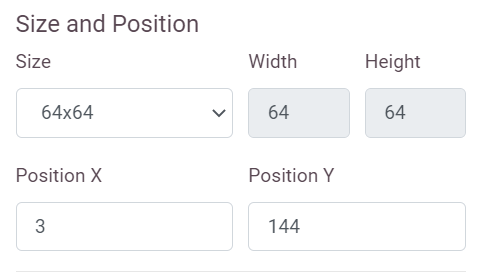
Fine Adjustments of Key Positioning
- Scroll down on the “Key Properties”.
- Locate ‘position X and ‘position Y’
- These are the X and Y axis positions in pixels of the Key on the POS screen display.
- Enter the numbers for the desired positions of Key here and press enter.
- Key will ‘Snap’ into new position set.
- ‘position X’ and ‘position Y’ can be used to check Keys are in uniform positions on the display screen.
Template Properties
Every applied value assigned to Template and Keys can be viewed and edited here. You can make fine adjustments to the settings for each of the following fields and find the following information:
| Template ID | Number generated when creating a new template. Assigned to device in Data Editor. |
| Key Type | Determines the functionality of the key. |
| Shape ID | The Shape of the key set in template editor. |
| Key Flags | Value depends on what key type is set. |
| Key Value | Value depends on what key type is set. |
| posX | The X axis position of the Key as it will be displayed on the POS. |
| posY | The Y axis position of the Key as it will be displayed on the POS. |
| SizeX | The Size in pixels of the Key on the X axis as it will be displayed on the POS.. |
| SizeY | The Size in pixels of the Key on the Y axis as it will be displayed on the POS. |
| BorderW | The Width of the border around the key. |
| Border Colour | The Colour of the border around the key. |
| dnTop Colour | The top colour of the button (matches bottom colour if not using gradients). |
| dnBot Colour | The bottom colour of the button (matches top colour if not using gradients). |
| Font Size | The Size of the Font that will be used on the Key. |
| Font Type | The Style of Font that will be used on the Key. |
| Font Colour | The Colour of the Font that will be used on the Key. |
| Key Text | What will be written on the Key and displayed on the POS. |
| Table Seating | The number assigned to a table button if applicable. |
| Image ID | The number assigned to each image that has been saved in the database and assigned to a Key. |
Sub Templates/Sticky Overlay
Create and link new templates to Keys that contain extra items or features away from the main template display. Link them to Keys on the main template through the ‘Link Template’ process described in section 3.2.2
Payment Templates
- Add control Keys to a Payment Sub Template such as EFT, Cash or Cashless.
- Make sure to add an Abort Key to allow you to return to the main menu.
Sticky Overlay Menu
- Enable multiple quantities or items to be selected from within a menu that overlays a main menu Key. Set the number of ‘Max Selections’ allowing multiple selections to be made before returning to the main template screen.
- If a Sticky Overlay is used you MUST place an OK or Back Key on the template to allow you to return to the main template.
Sub Templates
- Build new templates with groups of items together
- Assign templates to Keys through ‘Link Template’ process described in section 3.2.2
- Use for products such as ‘Sandwiches’ which you may have under the one heading on the main menu then have a sub template with all of the types available.
- 4. Using a sub template will leave the main menu accessible once the item is selected.
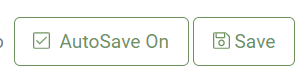
Saving work
In the top right hand side of the screen is the option to save and you can also select auto save, so your work is saved as you go along.
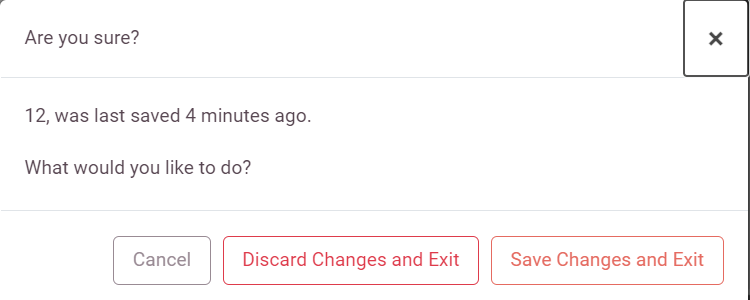
When you press “back to All Templates”, it will give you the option whether to save your work
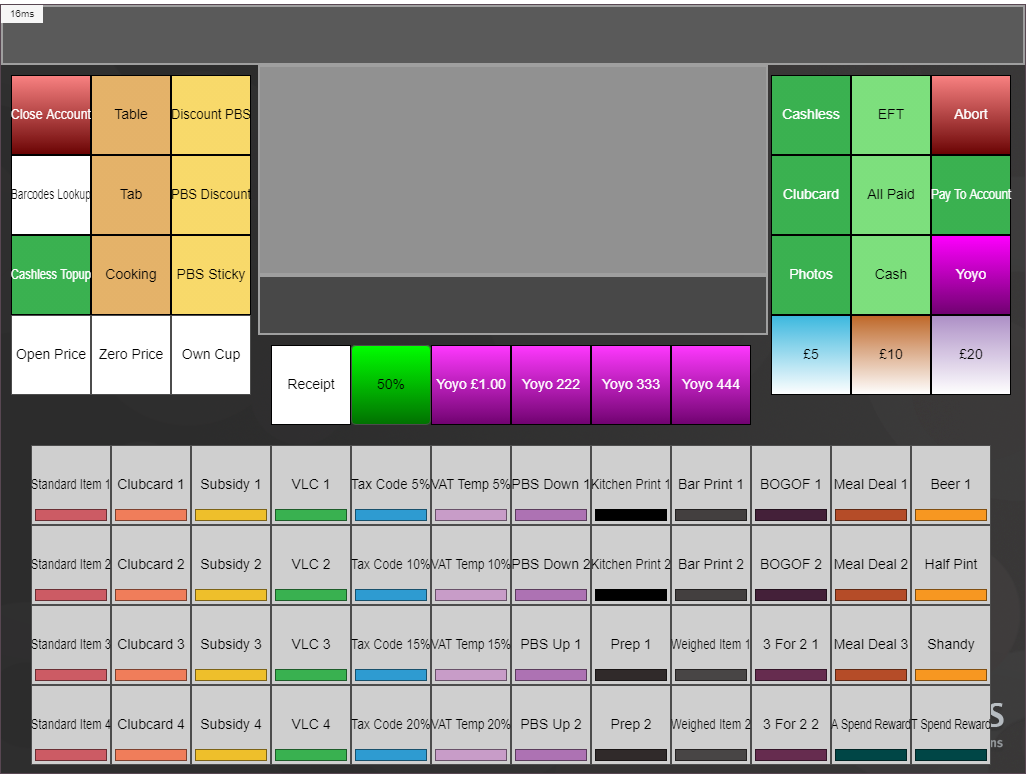
Completed Template Screen