
Introduction
The ‘Report Generator’ module found within the ‘Reports’ tab is generally used by System Users to create and manage reports based on cashless activity, loading, rewards, transaction, sales items and payments.
The Report Generator module allows System Users to do the following.
- Filter Reports – Get information on Cashless Activity, Loading, Rewards, Transactions, Sales Items and Payments.
- Save and View – Save reports previously generated for future reference.
- Build a New Report – Create a report specific to the information required. Report types available being around Cashless Activity, Loading, Rewards, Transactions, Sales Items and Payments.
- Select Dates – Set the timeframe that the report is built around Way2Pay activity.
- Build Query – Drill down into data specifics by selecting data fields that information is required on.
- Exporting a Report – Select report type PDF, CSV or Excel file formats. Choose between opening, saving, or sending the report via email now or scheduled to send regularly.
Report Generator Features
Build a New Report
First you will need select what type of report you will need. The options are as you have shown below.

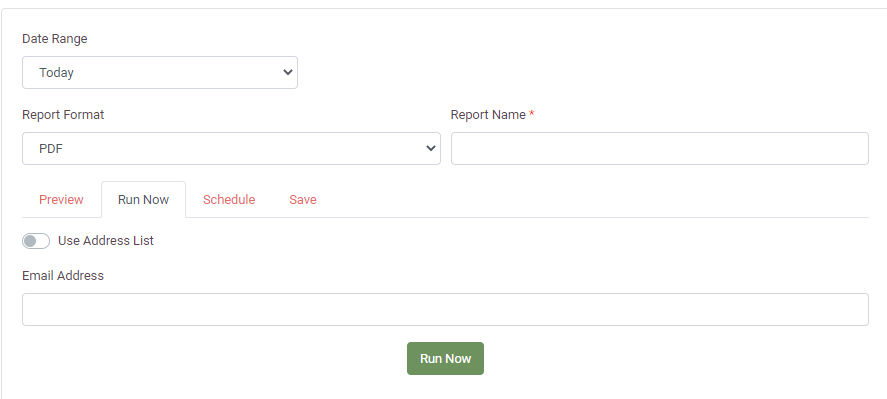
Click on the report you would like. You will then be presented with the page below. First select the date range and then using the drop-down menu select which Report Format you would like. Enter the Report Name.
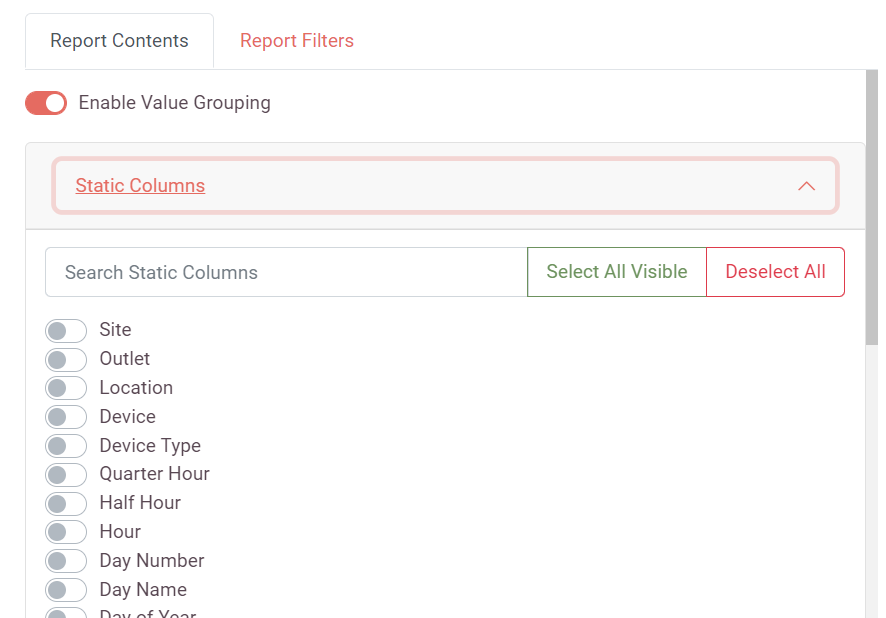
Selecting the contents.
On the right-hand side of the screen, you can select what content you would like in the static columns and the value columns.

Select the drop-down button on the right. You will be shown a menu of content, if you would like it to be included then tick the box. If you would like to select all the content, click “Select All Visible” and all boxes will be ticked. This is the same for Value Columns.
Applying a Filter
You can apply filters to your report on the right side of the screen.
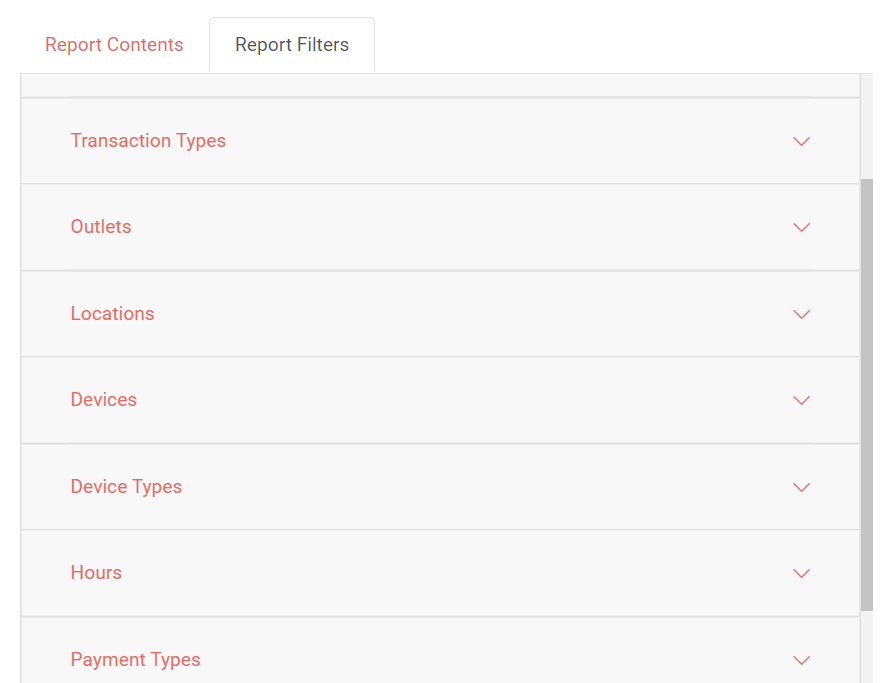
Select which section you would like to apply filter for and click the drop-down icon on the right.
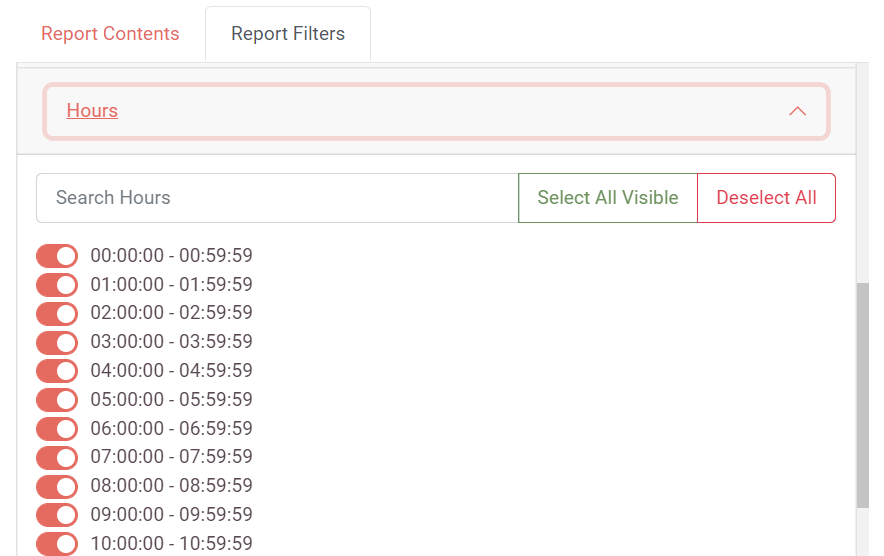
You will be presented with filter options.
If for example you did not want the report to run between the hours of 1am-3am, then untick these boxes.
If you would like to unselect all the filters, click “deselect all” & if you would like to select all the boxes click “select all visible”.
Running and Saving the Report
Previewing the Report
If you would like to preview the report first, you can select the preview option and this will present you with the preview.

Running the Report Straight Away
If you want to run the report straight away, then enter your email address and the report will be sent to you.
You can use the address list to find addresses.

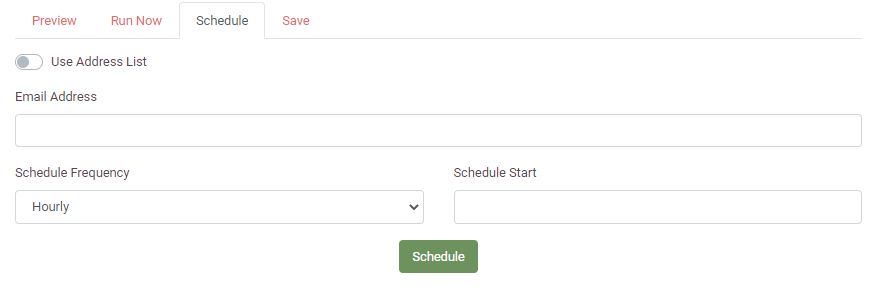
Scheduling the Report
If you would like to schedule the report so that is run on a later date, select “Schedule”. You will then see the box below. Enter your email address. Use the drop-down box the select the schedule frequency and enter the schedule start date. Then press “schedule”.
Saving the Report
If you would like to save the report, select the save tab, choose which users the report is visible to, using the drop-down tab, and then select “save”.

Viewing Saved and Scheduled reports
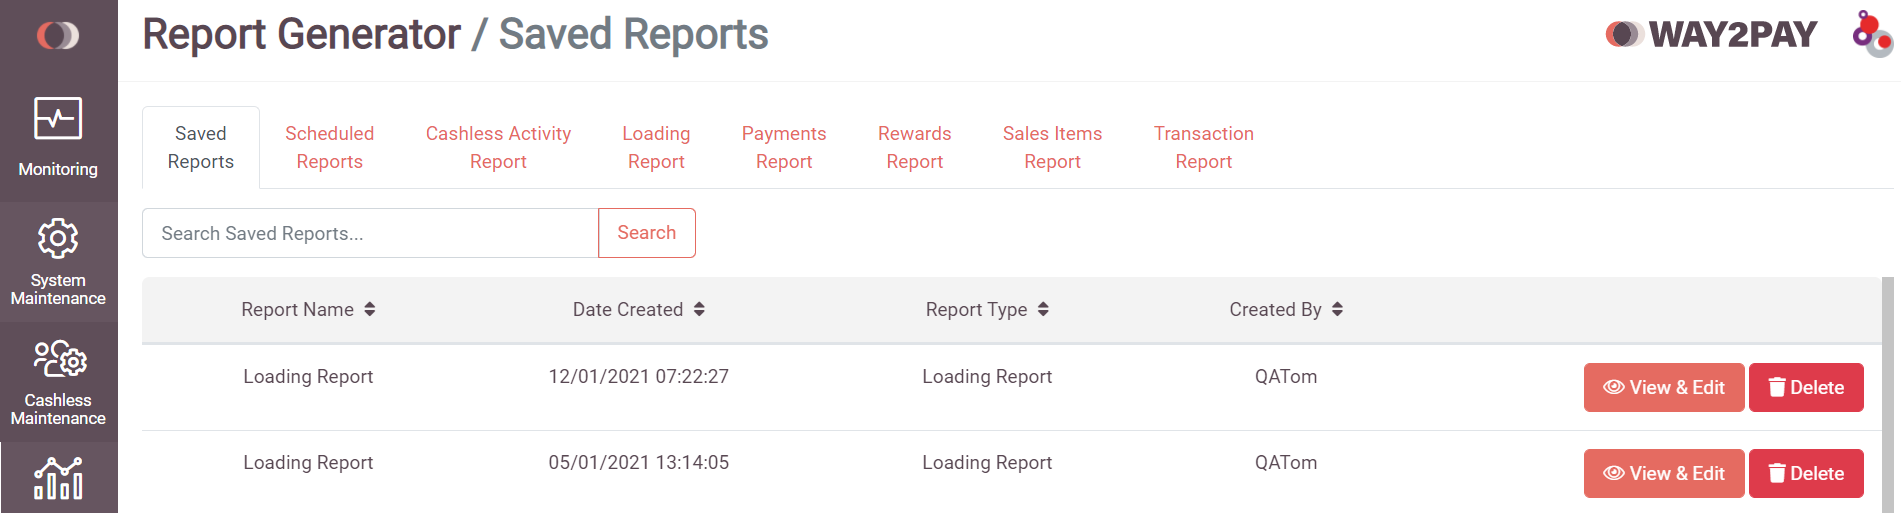
Saved Reports
You can find your save reports by going back o the main “report Generator” home page, and selecting the “saved reports” tab.
Scheduled reports
You can then view any scheduled reports, selecting “Scheduled Reports” at the top of the page.
