
Introduction
The ‘Branding’ module found within the ‘Maintenance’ tab is generally used by System Users to;
- Add customised branding to the online loader site.
- Add advertising images to J5X Screens on a POS or idle screens on Kiosk Loaders.
The Online section of the Brand Manager module allows system users to do the following:
- Upload Banner Images – Using organisational brand images uploaded to the database.
- Delete Banner Images – Remove old branding and adverts that no longer apply.
- Upload Static Hyperlink – Add links to partners websites or to organisation homepage with an image.
- Display Notifications – Have notifications appear at the top of the Loader Website.
- Display Twitter Feed – Assign a link to organisations Twitter account to keep users up to date.
The Device section of the Brand Manager module allows system users to do the following:
- Upload Advertisement Images – Have adverts appear on user facing devices such as J5X Tablet Display or Kiosk Loaders.
- Assign and Target Advertisements – Specific uploaded images to specific devices to target brand messages to an audience.
- Set Transition Timings – Set how long each image is displayed on screen before transitioning to the next.
- Set Advertisement Schedule – Set the duration that any uploaded images will be displayed for. Use for limited period offers etc.
Brand Manager Online Features
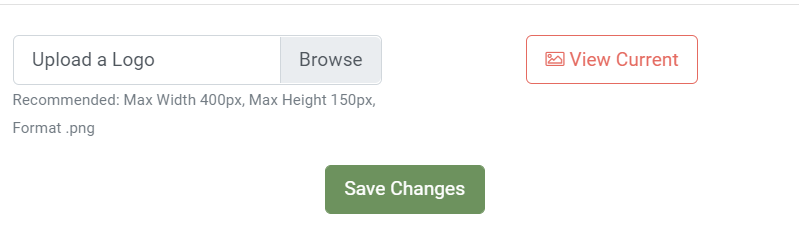
Upload Logo
The Upload Logo button allows system users to find and upload a Logo image, from their saved images on their PC. The uploaded Logo Image will be displayed at the top of the Loader Site Web Preview, in the centre of the screen ready to save.
Logo Images have a recommended Max Width of 400px, Max Height 140px and are recommended to be PNG format.
- Select ‘Browse’, select the image you would like from your folder and press ‘open’
- File will be uploaded, and you can view it by clicking ‘view current’.
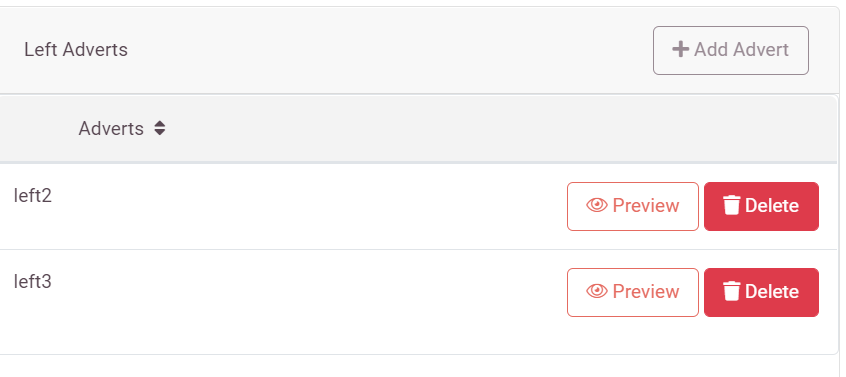
Upload or Remove Adverts
The Brand Manager module allows users to upload multiple adverts and images to the Loader Site. Adverts will be displayed on the left- and right-hand sides of the screen. The Loader Site will display up to 4 adverts at a time and cycle through images if more than 4 are added.
- Upload Advert box has a box for images uploaded to the left and a box for images uploaded to the right
- Select the Add advert.
- Select browse
- Choose your image.
- Repeat this process for each required advert or image that needs to be displayed on the Loader Site.
- If a Static Hyperlink and Twitter Feed are selected, then any advert images will display 2 at a time at the bottom of each side of the Loader Site Screen.
- Remove images from the Loader Site using the Red Delete Key.
Note. All adverts will be scaled to 300 X 300 px. (Recommended format PNG)
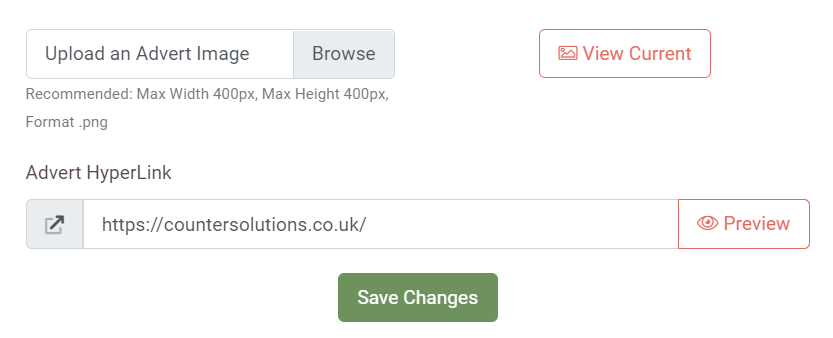
Static Hyperlink Advert
Upload a link to an organisation, or partners website as part of an advert displayed on the Loader Site. Static Hyperlink will be displayed in the Top Right position of the Loader Site screen.
- Type hyperlink address in the ‘Link’ box.
- Select ‘browse’.
- Choose image from PC for Hyperlink branding.
- You can view image by selecting ‘view current’
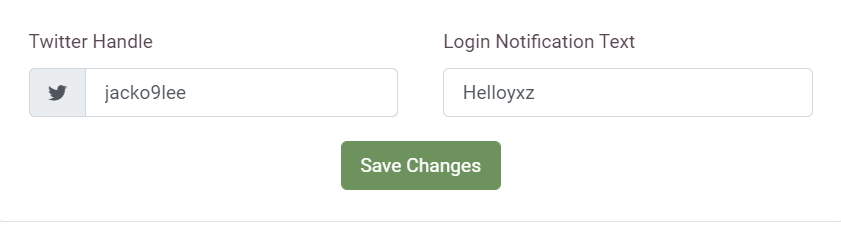
Twitter Feed Handle
Upload a link to an organisation, or partners Twitter Feed to be displayed on the Loader Site. Twitter Feed will be displayed in the Top Left position of the Loader Site screen.
- Type Twitter Handle in the ‘Twitter Feed Handle’ box. e.g. @countersolutions
- Example Twitter Feed will now appear Top Left of the Loader screen.
- Actual Twitter Feed will be shown on the Loader Site.
Save Changes
Press “Save changes” after you have edited a particular section and the changes will immediately appear on the loader site.

Brand Manager Device Features
Devices
- Select the “Device” tab to view the devices and select you want to view.
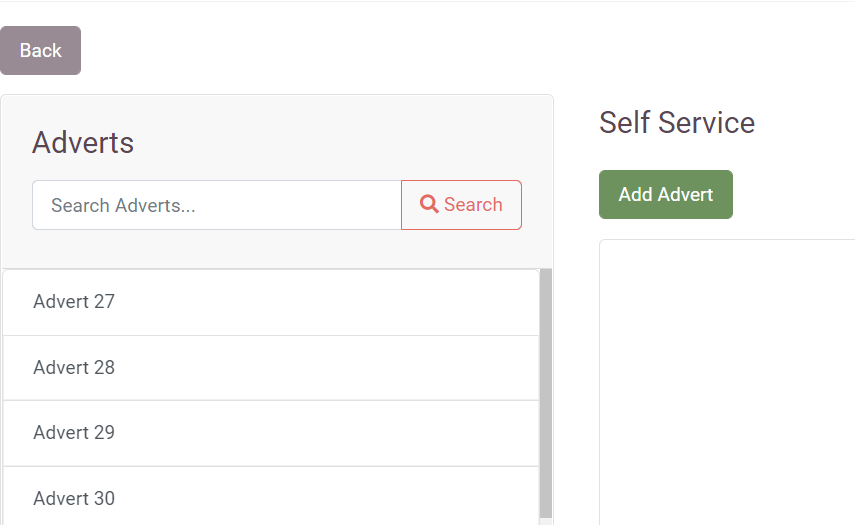
Upload Adverts
- Select the ‘Add advert’ box.
- Browse and select the image you would like.
- Select upload.
- A box will appear to tell you the upload was successful.
- To delete any adverts, click the red delete button and it will remove the advert.
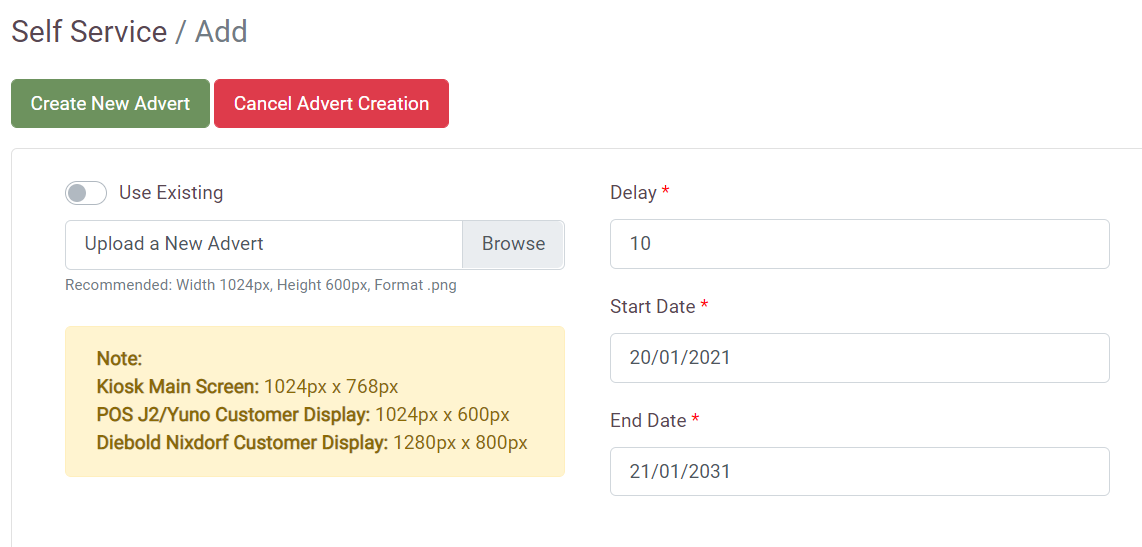
Set Transition Timings
Set the amount of time that advertisement images are displayed on a device for as they cycle through.
- Go into the ‘device’ section at the top
- Select the advert you would like to edit
- Move the scroll bar to set display time for each image anywhere from 1 to 30 seconds.
- Select a date for the advert to be displayed from.
- Select a date for the advert to end being displayed from.
- Select ‘upload advert’.
Troubleshooting
- Ensure images are added to the correct area.
- Ensure images have the correct date range set.
- Ensure images are the right size for the screen they will be displayed on.
- Ensure images are always PNG.