
Introduction
The Product Manager module found within the ‘system Maintenance’ tab, under “Products” is generally used by system users to edit and maintain information for products being sold through the Way2Pay system The Product manager module allows system users to do the following:
- Search Products – Using product name to check product information and make changes to the database.
- New – Create new products to the Way2Pay database.
- Edit – Update and maintain the information relating to a product currently in the database
- Copy – Duplicate the product information for a product within the database. Use when adding new similar products.
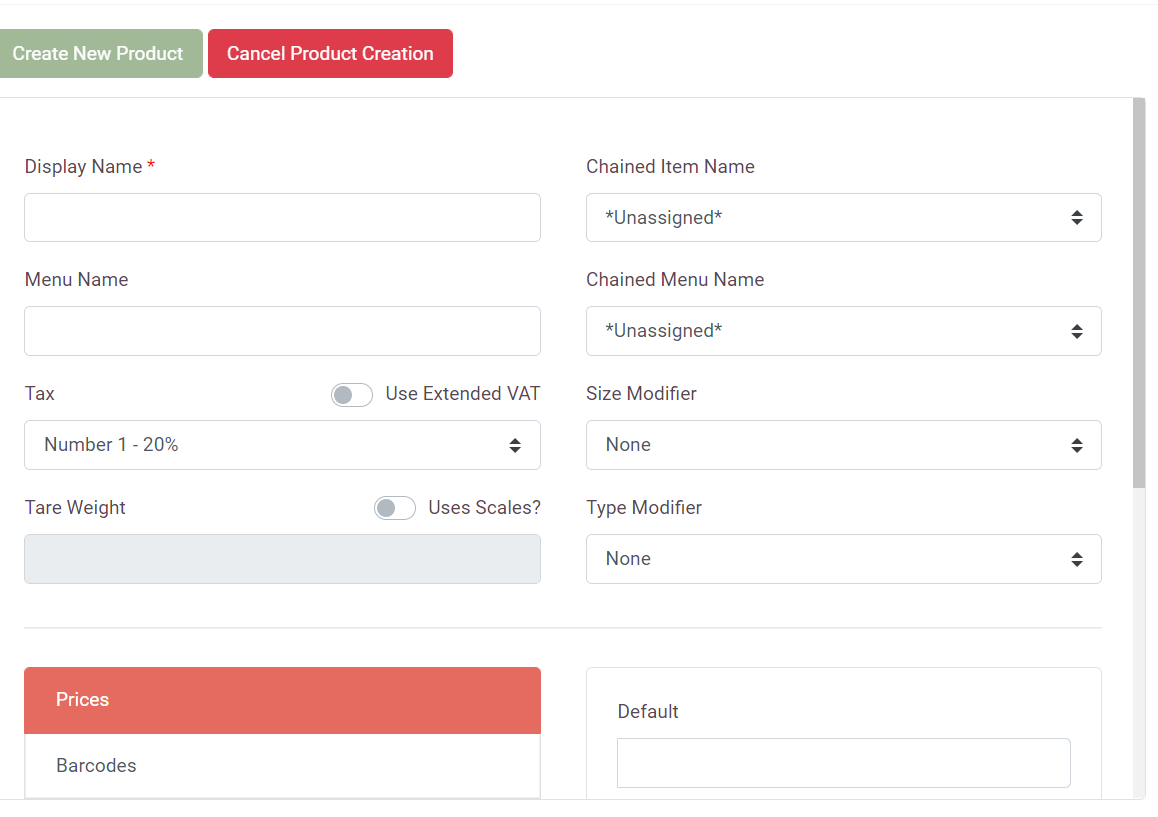
- Name – Identify what the product is to be known as in the database. Limited to 15 characters.
- Extended Tax Code – Allows different tax codes to be applied to different price bands. e.g. Takeaway/Eat in. This will change Tax Number to Tax Code and allow you to select from options.
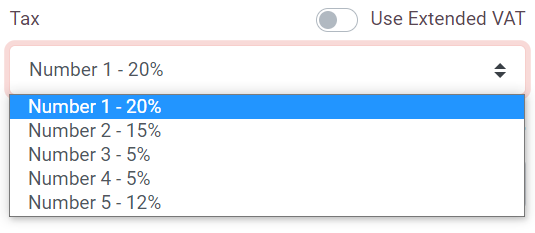
- Tax Number – Link a product to an applicable tax rate that has been set in the database. Tax rate 1 for 20% VAT for example.
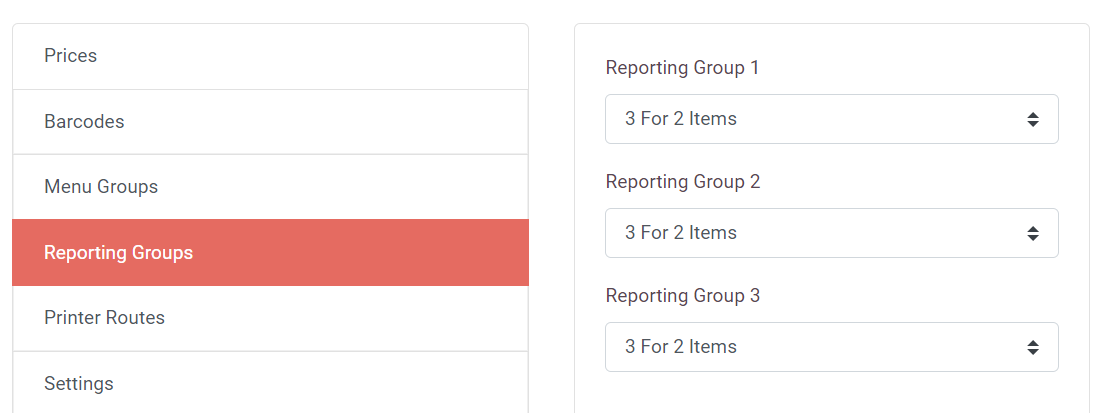
- Reporting Group – Link groups of products together e.g. “Drinks” or “Hot Food” for reporting purposes.
- Price – Set the amount that users will be charged at point of purchase. Different price bands can also be set to allow differentiation between users from different departments e.g. Staff/Contractor and how much users are charged.
- Barcode – Input unique product barcode number either manually or scan the product using a barcode scanner connected to your PC. Multiple barcodes can be assigned to one product within the system to allow for product variants.
- Tare Weight – Enter the weight in grams of non-chargeable items included in a purchase. For example, the weight of an empty bowl at a salad bar, as this would not need to be included in the weight of a bowl of salad being purchased.
- Chained Item Name – Enter name of an item that is often purchased together with this item but charged as an individual item. e.g. Fish and Chips.
- Chained Item Menu – Chained items can be put into sub menus on POS systems such as ‘lunch’ where you will find chained items linked together to make the user experience more efficient.
- Kitchen Printer – Items can be assigned to kitchen printers so when an order is placed at the POS a printer device will produce a receipt for the kitchen to be able to begin preparing an order.
- Menu Groups – Items can be assigned to specific menus on the database. Allowing you to access templates of groups of items together. e.g. kids’ menu, drinks menu.
- Name for Customer Menus –
- Allergens – These can be assigned to specific products within the database so that users can check via the loader site what products are safe for them.
Product Manager Features
Search Products
The search box allows System Users to find a product within a database by entering the product name or scrolling through the product list on the database.

Add/Edit Product
Editing or Adding a new product to the database
Adding New Account
- Press the ‘Create new product’ button and enter a name or product description for the new item. Limited to 15 characters.
- Once you have entered in all the information select “Create New Product”.
Editing Account
- Select the product you would like to edit and press the ‘Edit Product’ button after selecting a product from the product list to begin amending product information.
- When you have completed all of the relevant information press ‘Save Selected Product’.
Product Tax Codes
- Select if product requires an ‘Extended Tax Code’ allowing for price options such as ‘Eat in’ or ‘Takeaway’ as these can often be taxable at different rates.
- Select the correct Tax Number applicable from the pre-set site information in the database. For example, Tax Code 1-20% or Tax Code 2-15%.
Reporting Groups
- Place products together in Reporting Groups to enable easy analysis of things such as BOGOF promotions or Meal Deals.
- Choose from drop down menus on right hand side of screen to place items into groups required.
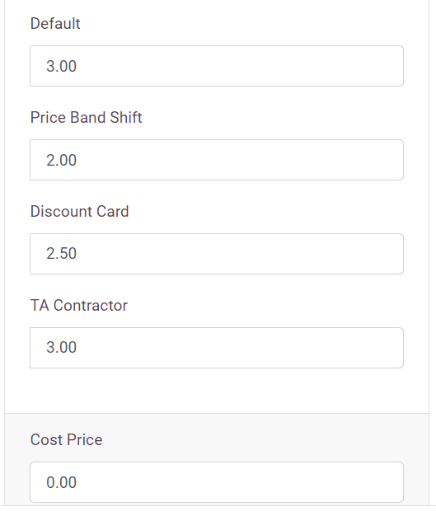
Setting the Price
- Price Bands will have been established in the setup of the database. (Details can be found in DATA EDITOR – PRICE BANDS). These will show on the right-hand side of the Product Manager screen.
- Default found in Prices section is the standard price of the product to be charged. Enter the standard price of the product here.
- Complete any other Price Band fields for alternative prices to be charged.
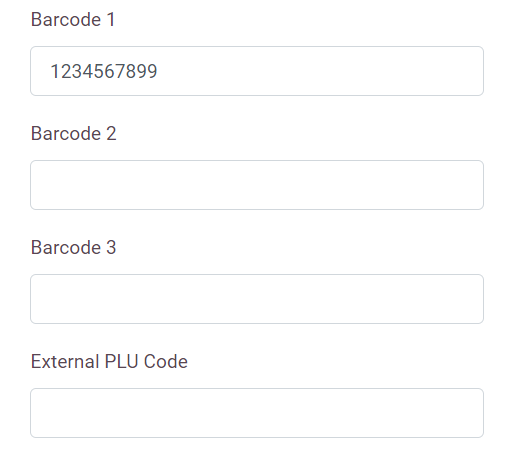
Assigning Product Barcodes
- Enter the Barcode found on the product for scanning at the POS
- Multiple barcodes can be entered if needed to link to product within the database if alternative barcodes are available for the same product.
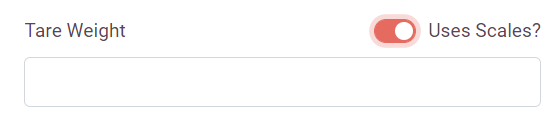
Applying a Tare Weight
- Use Tare Weight when products sold by weight have additional features such as bowls included in the weighing process.
- Enter the Tare weight of any non-chargeable goods to be included in the sale of a weighed product. This may be something such as a plastic bowl in a weighed salad bowl sale. Weight is recorded in grams.
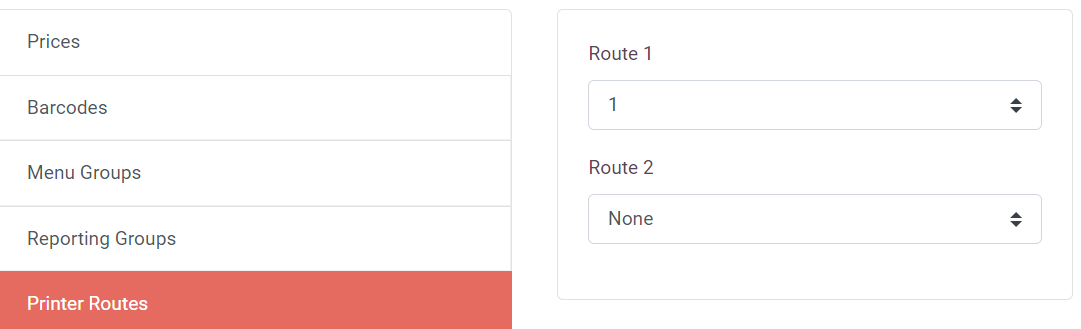
Adding a Kitchen Printer
- Use if required to send order information to kitchens and back of house for preparation.
- Go into the section titled “printer routes”
- Assign item to whichever printer required using drop down menus on right of screen and select from printers already entered in the database.
- When item is ordered at the POS information will now be sent to printer to be prepared by Kitchen.
Menu Groups
- Products can be grouped together for reporting and sales using pre-determined menu groups such as ‘Drinks’ or ‘Lunch’
- Select the group you wish to place the item in from the options on the right-hand side of the screen.

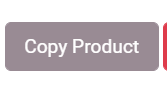
Copy an Item’s Information
Select a product and at the top of the page click “copy product” to duplicate product information if you have many similar products to add to a database. This saves time and allows you to have to amend a minimal amount of information.
Settings and Product Flags
- Apply specific parameters to a product, setting what features can and can’t be used and what restrictions may need to apply.
- Select “settings”, and you can select which restriction you want.
- Item flags will be set from here but can also be set from Data Editor
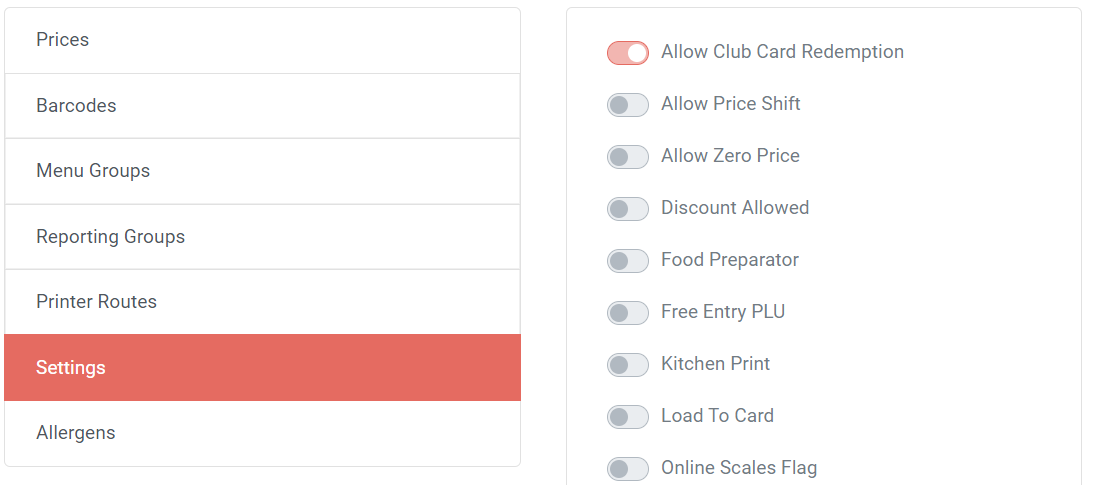
Product Flags
| Flag Name | Description | Example |
|---|---|---|
| Food Preparator | Sets an item as a preparator such as for kitchen printing purposes | Medium Rare, Well Done |
| Free Entry PLU | Sets an item that once selected on the device it asks the operator to enter any price for that item. | |
| Allow Zero Price | Sets an item to allow the device to process an item at 0.00 price for free products (only processes sales audit if processed against a cashless transaction). | |
| Use Barcode Flag | Allows the item to be scanned at the device (as long as the correct barcode has been assigned against the item) | |
| Kitchen Print | Sets an item to print to a kitchen printer (as long as kitchen printing routes have been assigned against the item) | |
| Discount Allowed | Allows the item to be processed against a discount scheme (as long as the discount scheme has the item in the accepted items list within the ‘Discounts’ module) | |
| Allow Price Shift | Allows an item to be processed at a different price (price can be switched manually by the operator or by automatic price shift set at cashless department level) | |
| Load To Card | Allows an item to be created on a POS to allow a customer to top up their cashless account at the POS | |
| Use Extended VAT | Allows an item to be processed at different price bands with different VAT codes | Eat in and Takeaway could be setup to use different VAT codes |
| Scales Flags | Allows an item to be weighed one scales to determine the price based on weight | |
| Online Scales Flag | Allows an items weight to be entered manually to determine the price based on weight | |
| Use Specific Purse | Allow an item to only be processed against a specific cashless purse | |
| Allow Clubcard Redemption | Allow an item to be redeemable against a Club Card scheme |
Troubleshooting
Usually, if a product is not working correctly in a device, this tends to be because the correct product flags have not been set so we would always advise checking what product flags have been set within the ‘Settings’ part of the module when an item is selected.